Remove Media Individually
RetailOps offers two ways to remove media. You may remove individual media images through the PIM, or through the Data Import tool to remove media in bulk (Please see next section). Removing media through the PIM allows you to selectively remove specific images. This will also allow you to remove broken media if necessary.
-
Open the desired product in the PIM.
-
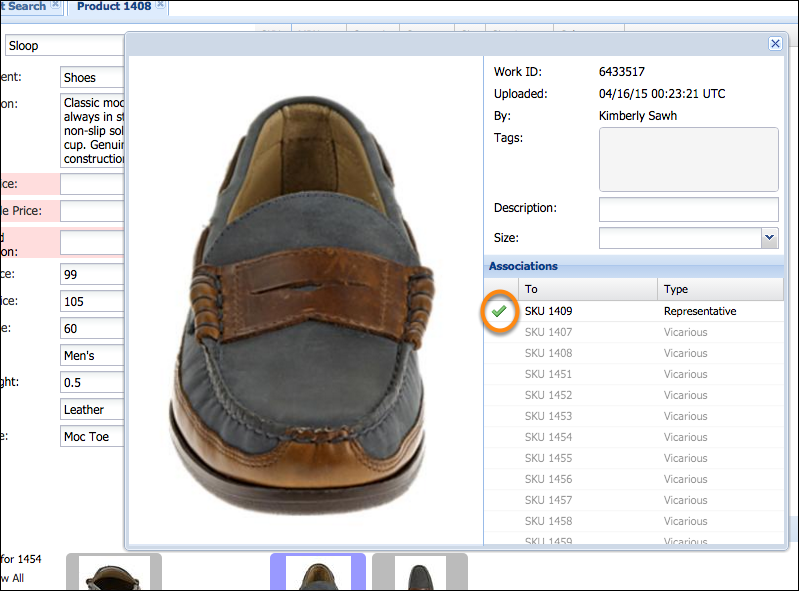
Double click to open the image you want to remove.
-
Under the Associations pane, toggle any green checkmarks to red-X icons.
-
Close the image window. Press the [Refresh] icon in the PIM Action panel to confirm that the media has been removed.
Remove Media in Bulk
Alternatively, you may remove media in bulk using the Data Import tool. This method will remove ALL media images associated with the SKUs specified in your import file.
Required Data in Import file
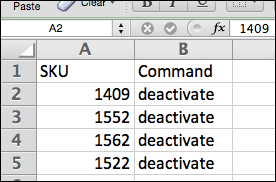
To deactivate media, you will need to import a spreadsheet with the following data:
- SKU
- Command with a value of "deactivate" for all SKUs listed
Directions
-
Create a spreadsheet file with the required data (specified above).
-
In the RetailOps web app, go to Administration > Data Import.
-
Drag-and-drop your spreadsheet file into the designated area.
-
After the import is complete, click on the file Name.
-
Either select an existing profile with the Import type of Bulk Media Edit or create a new profile with that Import type selected.
-
For Column match mode, select headers.
-
Assign each of the columns to their respective fields.
-
If there are any errors, edit data as needed by clicking directly on the desired cell.
-
When you have resolved all errors (or if there were none to begin with), press the [Apply changes] button.


Comments
0 comments
Please sign in to leave a comment.