RetailOps 2.0 features a robust point-of-sale (POS) tool to assist customers at checkout. Watch the video or read below for instructions on completing POS orders at checkout.
Open the POS tool
To open the POS tool, go to your left nav menu and search for "POS". Click on the POS tool.
Note: You must login at the start of each new checkout.
Complete POS Orders
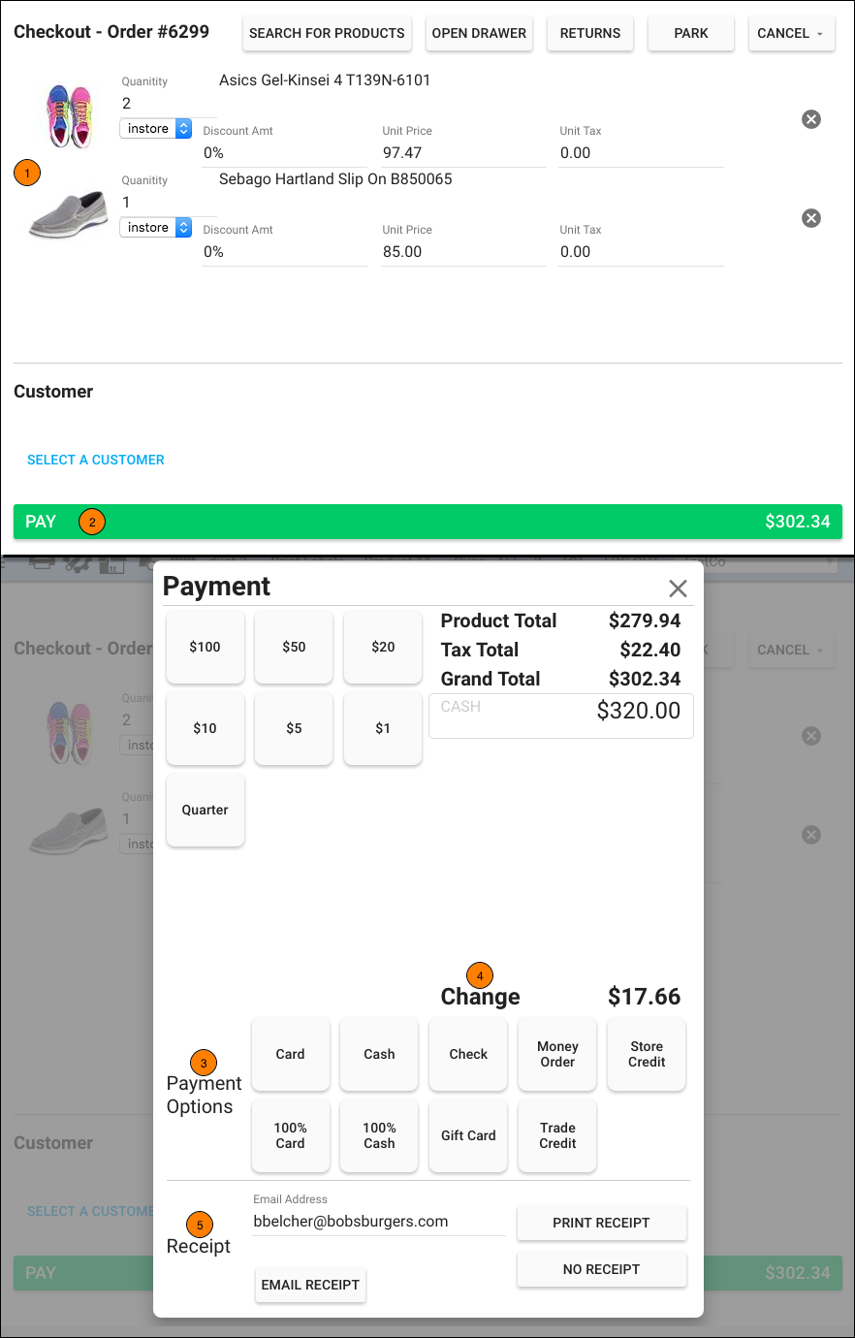
- Scan items onto the order.
- If you would like to ship an order item to the customer, select "Ship" in the dropdown to the right of the product image. To learn more, check out this article: Ship POS items to customers
- Press the [Pay] button at the bottom of the screen.
- Select the Payment Option. Take payment.
- If needed, give customers their change.
- Provide a Receipt. You may choose to print the receipt or email it to the customer. If the customer declines a receipt, you may press the [No Receipt] button.
Add Items by Searching Through Inventory
You may also add items onto the transaction by searching through your inventory. This is useful if the item's label is missing or the barcode is damaged. This can also be useful if a customer is asking about availability of an item not displayed in your store.
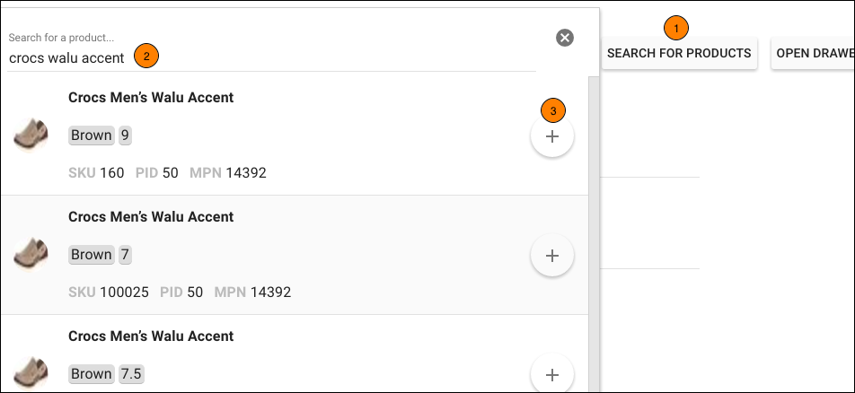
To search for an item:
- Press the [Search for Products] button at the top of the screen.
- Enter a search and press ENTER/RETURN on your keyboard.
- Locate the desired item and press the Add [+] button.


Comments
0 comments
Please sign in to leave a comment.