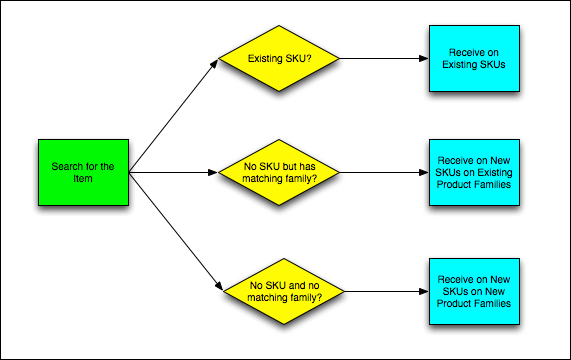
The Product Receiving tool allows you to receive products into your inventory against the POs on which they were ordered. The flowchart below gives you an overview of the main parts of the product receiving process.
Product Receiving Overview
Search for the Item
You'll start by searching for the item to see if the item or its product family already exists in your inventory.
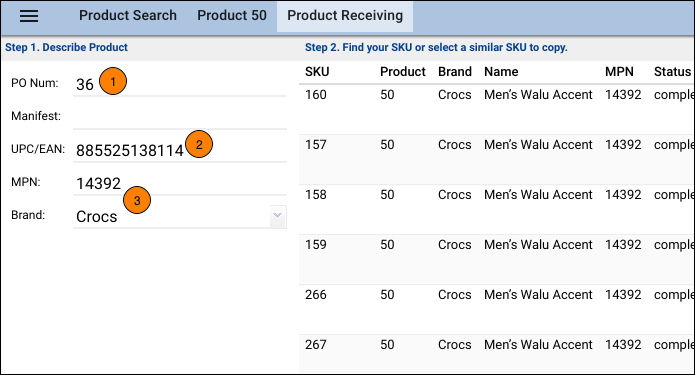
- Under the Describe Product pane, enter the PO Number.
- Scan the item's UPC/EAN barcode.
- Enter any other search parameters that could help you locate the item.
What are the results of your search?
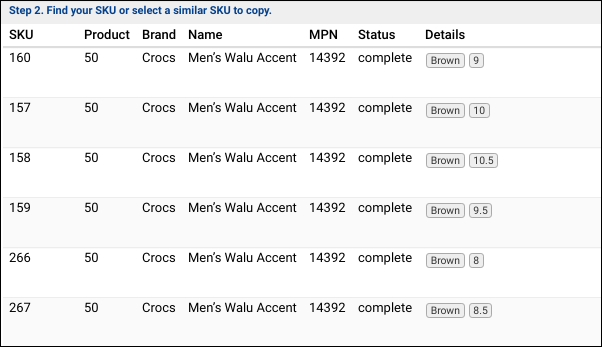
After performing your search, your search results in the Find your SKU or select a similar SKU to copy pane will determine your next steps.
There are three possible scenarios and a different path forward for each:
Receive on Existing SKUs
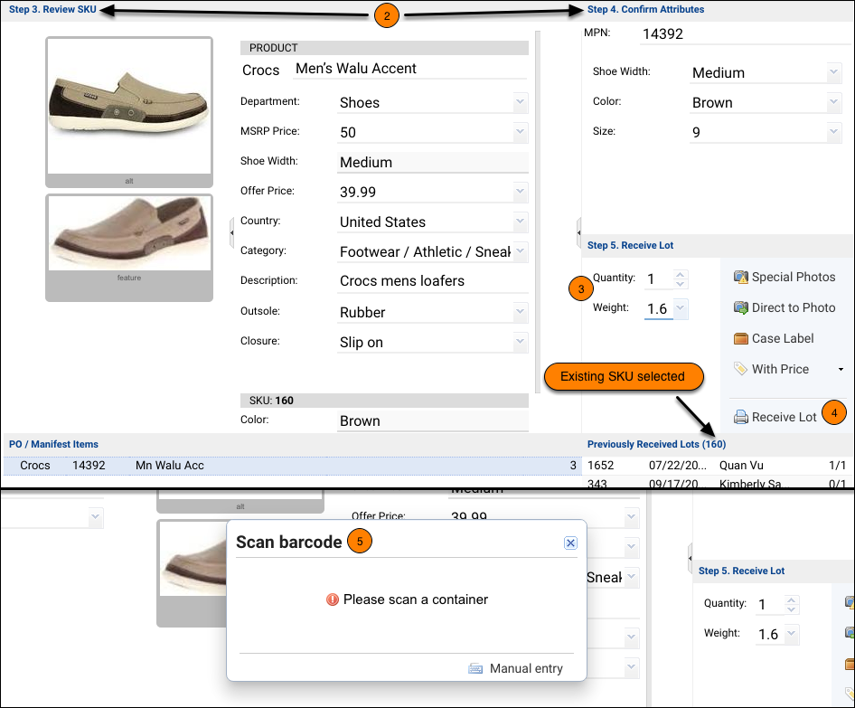
If you were able to find an existing SKU that matches your item, take these steps:
- Select the existing SKU from the search results.
- Under the Review SKU and Confirm Attributes panes, review and confirm the existing info.
- Under the Receive Lot pane, enter the Quantity and Weight.
- Press the [Receive Lot] button.
- Scan the container into which the item will be placed.
- After the item's lot label prints, place the label on your item.
Receive on New SKUs on Existing Product Families
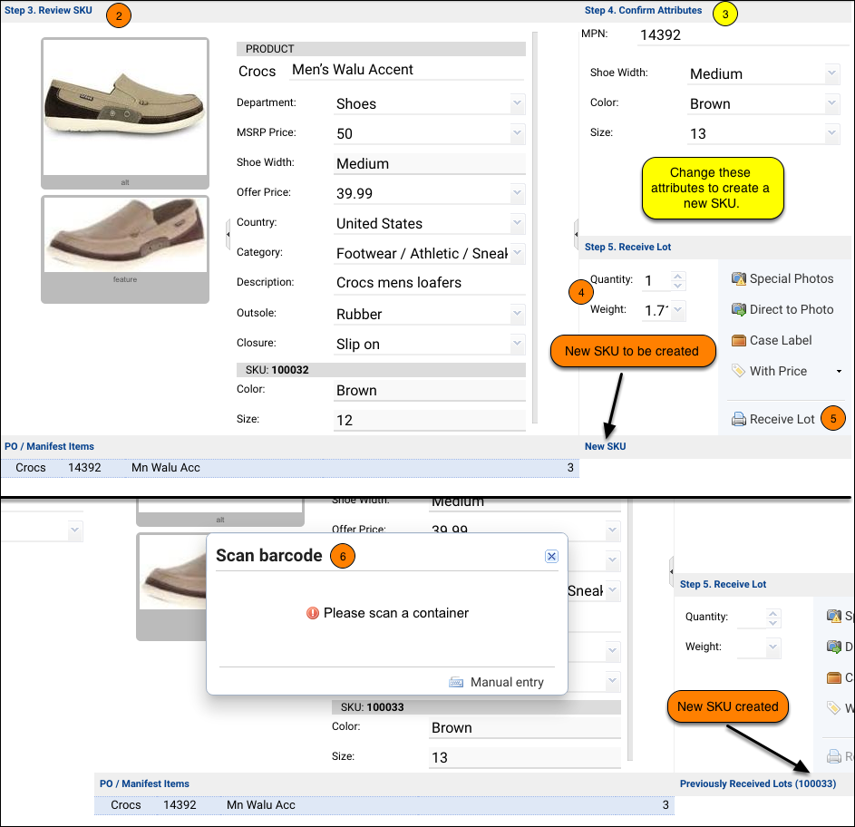
If you were NOT able to find an existing SKU but you did find a SKU from the matching product family, take these steps:
- Select the SKU from the matching product family from the search results.
- Under the Review SKU pane, review the existing info.
- Under the Confirm Attributes pane, edit the attributes for your item. Editing attributes here will automatically create a new SKU under the same product family.
- Under the Receive Lot pane, enter the Quantity and Weight.
- Press the [Receive Lot] button.
- Scan the container into which the item will be placed.
- After the item's lot label prints, place the label on your product.
Receive on New SKUs on New Product Families
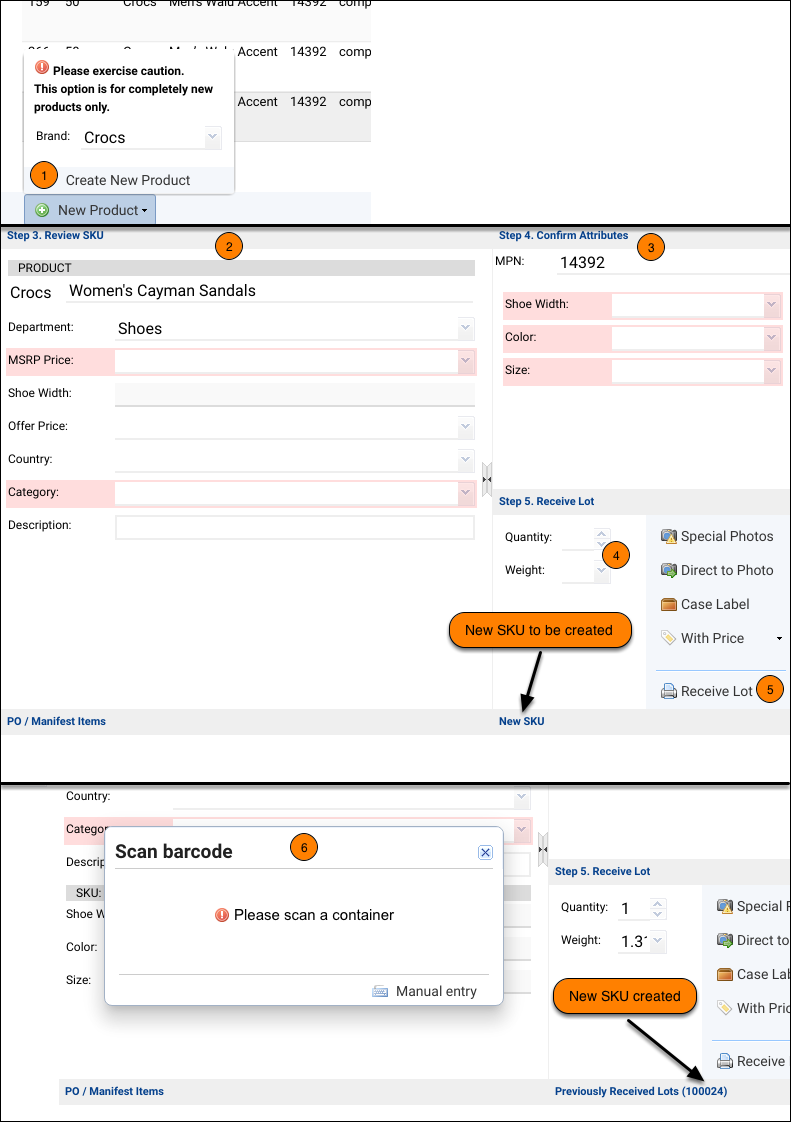
If you were NOT able to find an existing SKU or a matching product family, take these steps:
- Below the search results, press the [New Product] button. Enter the Brand and press [Create New Product].
- Under the Review SKU pane, enter info for the product family.
- Under the Confirm Attributes pane, enter the attributes for your item.
- Under the Receive Lot pane, enter the Quantity and Weight.
- Press the [Receive Lot] button.
- Scan the container into which the item will be placed.
- After the item's lot label prints, place the label on your product.
Receiving Toggles
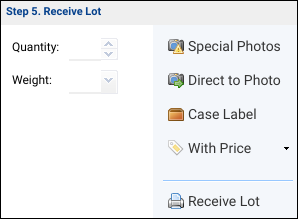
Before pressing the [Receive Lot] button, there are four more receiving toggles.
- Special Photos
When pressed, the item will be flagged for exclusive media rather than the default of representative media. Media attached to this item cannot be used for other items. For more on the difference between exclusive and representative media, read theMedia Management FAQs. Note that you must have created a new SKU for this particular item. - Direct to Photo
This button supports an alternative workflow. When pressed, the item will be flagged to be sent directly to your Photography team so they can take product photos. The item will bypass the Photo Samples tool queue. This workflow prevents you from having to receive the lot, move it into storage, and then move it back out of storage for product photos to be taken. - Case Label
This button is designed to store small items such as nuts and bolts together without having to print individual lot labels for each unit. When pressed, one case lot label will be printed for all units being received. Note that you must enable the System Config Account Setting "Use Case-lot-label" to use this feature. - With Price/No Price
This toggle controls whether lot labels print with prices displayed or without.
Voiding lots
If a mistake is made during receiving, it can be helpful to fully void the lot you received, and receive it again with the correct information/weight/sku, etc. You may only void lots which are less than 48 hours old.
To void a received lot:
-
Locate the lot you'd like to void underneath Step 5 in the Receiving tool. (You may need to reopen the PO you received against, and select the same line item in order to see the previously received lot).
-
Select the lot. (1)
-
Select [VOID] (2) from the bottom menu bar.
-
Follow the prompt, and select "Yes" when you are ready to void your selected lot.
-
Ensure you have covered or destroyed the original lot labels.
-
Re-receive your product.


Comments
0 comments
Please sign in to leave a comment.