Before you begin recording inventory items in RetailOps, you will need to assign location name to your shelf space in the warehouse. After you develop a naming convention for your locations, you can create locations in RetailOps and move items into them. This tool also allows you to migrate your existing warehouse locations by recreating them in RetailOps.
- Open the left Navigation menu and go to Administration > System Config > Inventory Containers.
- At the bottom of the Location Design pane, press the [Add] button.
- Select the Facility/Zone for the new containers. Set the container Type to Location.
- Select the Area where the container will reside.
- Pickable. The main area where you store your items. Items in these containers are pickable, meaning they may be picked to fulfill orders.
- Receiving. A staging area for inbound shipments of purchase orders. These items are not pickable. Note that if you use JIT fulfillment, JIT inventory must be received into a pickable location, not a receiving location.
- Shipping. For outbound shipments of customer orders. These items are not pickable.
- Lost. For lost items. Lost containers are not real containers but they can assist in reporting purposes.
- Store only. These locations are used only for Point of Sale transactions. This inventory is not considered pickable, but is available for POS sales.
- Allocatable. These locations are used specifically for the "backstock replenishment workflow," in which stock quantity is listed as available, however it is not pickable, and requires a transfer to a pickable location. Read more about the backstock replenishment workflow here.
- Enter the Prefix and any Ranges inside your location code separated by punctuation in-between. You may also enter a Suffix. For more help, read the “Set Ranges on Location Codes” section below.
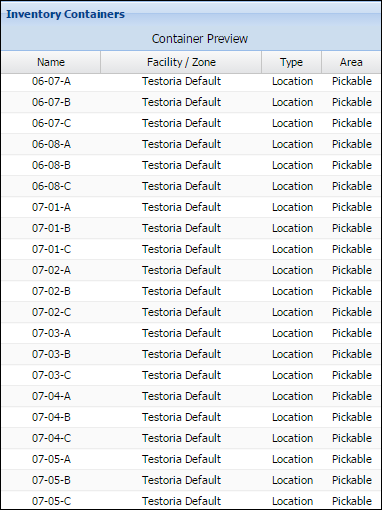
- Press the [Preview Containers] button. These containers will display in the Inventory Containers pane.
- At the bottom of the Inventory Containers pane, press the [Create Containers] button.
- If you need to print the location labels, select your label type and select Print x Containers.
Set Ranges on Location Codes
Location codes are unique codes that identify the physical location of a storage container. Ideally, your location codes should not just be readable by machines. They should also be easily interpretable by humans.
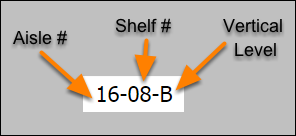
As a matter of example, let’s say your warehouse has 20 aisles of shelf space for storage. Each aisle has 8 shelves. Each shelf has 3 vertical levels. A typical code might look like this:
This code provides you with all the information you need regarding the location of an item. This code tells me I can find the item on Aisle #16, Shelf #8, B-level.
To create these containers in RetailOps, you would need to enter the following:
Print Container ID Labels
After you have created your containers, you can print the container ID labels for easy scanning. If you need to reprint these labels at any time in the future, you may do so following these same steps.
- In the Location Design pane, select the desired container group. Containers that have already been created within that group will appear under the Inventory Containers pane.
- In the Inventory Containers pane, select the containers for which you’d like to print container ID labels.
- If no selection has been made, all containers created within the container group will be selected by default.
- Select the label formatting. Press the [Print container] button.


Comments
0 comments
Please sign in to leave a comment.